The Fabulous Flatlay
- karenhb
- Jan 12, 2021
- 4 min read

I'm trying to recall the first time I heard this term - flat lay. It's really not that long ago. I can remember being asked for one for a job several years ago and having to look the term up. It seems that it came into being as a proper thing in 1987, originally called knolling because the first person who began this trend worked for a furniture store that sold Knoll furniture, he began by laying out his tools symmetrically and then photographing them from above. Also called the top down, the bird's eye view, from above or the overview. When the flatlay met Instagram, well that's when it came into it's own.
It is huge on Instagram and works for a variety of reasons but mainly because these type of shots tends to be strong graphic images, with strong shapes and can help you stand out on the endless scroll, plus it is a very easy shot to create and snap with your iphone. Take my word for it, it can be a lot easier and less time consuming that taking a 45 degree angle shot where you have to think about the background and worry about how the light is hitting your subject.
All you need is a flat area next to a window where you can place your objects. Mine are always of food but they work fabulously for all sorts of products. You will have seen those cosy images with hands on mugs next to a book, perhaps a vase of flowers. Beauty products work particularly well with endless possibilities and if you are an artist or creator or have some sort of service based business, showing the tools of your trade can work really well, even phones and a desk can look good in a flatlay. Personally I love a bit of mess so adding crumbs, or ingredients within recipes or a mug of spilt tea can add a bit of magic.
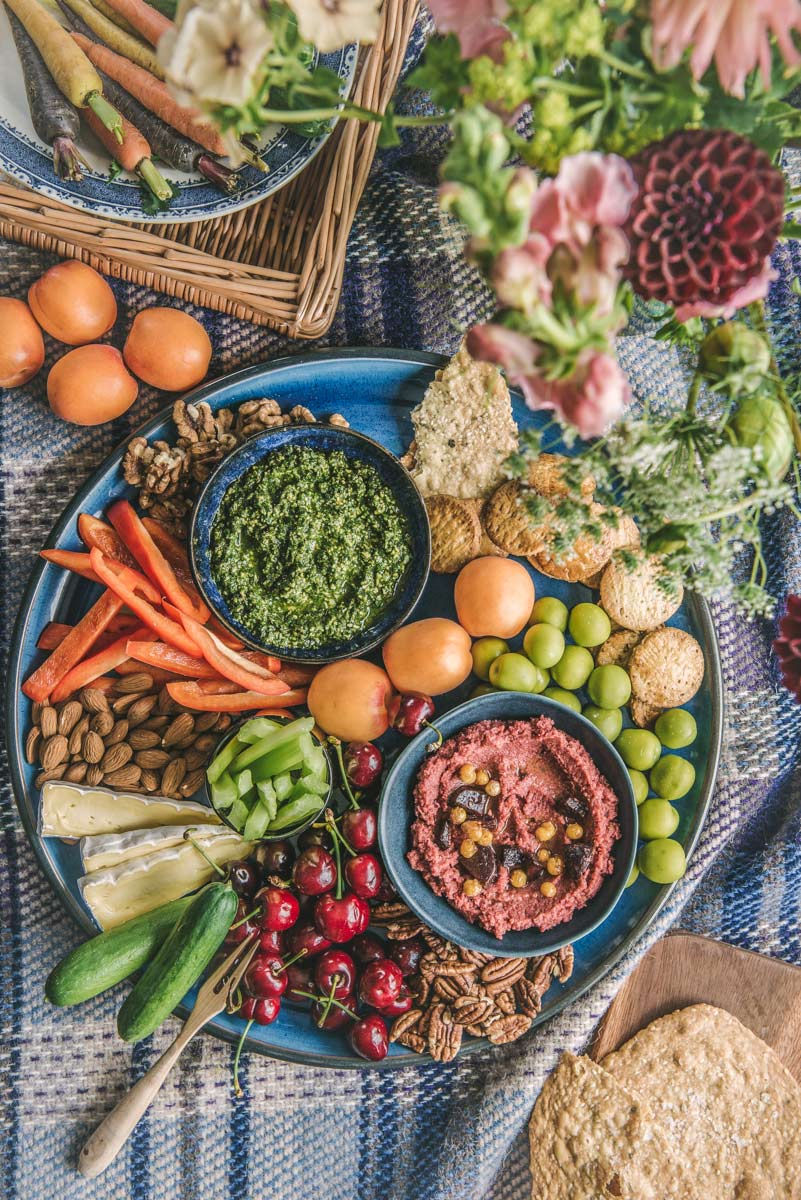
So I decided to have a bit of a play with some cherries to work out the sort of shapes that work quite well. Circles are off to a head start in the first place . The main thing to be aware of is that you want to create a dynamic image where the viewer's eye is led around the frame. Almost anything goes with a flat lay, whether it is with a central subject, haphazardly or neatly placed objects.


The first image is a good place to start with one large central item or a little off centre with a few bits pieces around drawing the viewer's eye to the main dish. The image on the right is pretty random, you can see curves and circles so the viewer is being led around the frame from bowl to bowl. The images below I have simplified a little and just used the cherries. The one on the left has an obvious C shape and the one on the right an S shape, both useful ways of styling flat lays. They don't have to be bowls or circular, they could be anything.


Below are a couple more images of the same cherries in different formations as it were. The left one could be called the Threesome, threes and odd numbers work very well in styling and the one on the right is just using the corner and one edge of the frame with a lot of negative space. Negative space is very powerful and it also makes it very easy to create a simple scene just in the corner. Somehow it adds drama. Carefully placed cutlery can also help lead the eye of the viewer around the frame. And remember it is always good for some items to fall over the edge of the frame, it helps give the impression of a bigger scene.


There are some products that do not work well in a flat lay. Some jars of food do not look good on their back though it's amazing how many do. In which case you need to put the contents of the jar in a small dish and then surround it with either the ingredients or food that goes well with it. Over the years it has become more acceptable for products to lie on their backs, even a bottle of wine looks fine.
Essentially a flatlay is all about composition and interesting shapes. The two examples below follow ancient painting rules which artists have used over the centuries in order to produce pleasing pictures. The first is the golden triangle which is created by halving a rectangle diagonally and then drawing a line from the remaining opposite corner to form a right angle with that diagonal line. You then use these lines as a guide to place your subjects, edges of objects or cutlery. They do not want to be followed too closely as they may look contrived.


The golden ratio below is also a beautiful rule. It's a rectangle divided into two with a square filling one half. The same thing is done to the remaining rectangle and so on and so forth until you can draw a curve through each square creating this Fibanacci pattern. It dos not want to be too exact but if you are struggling can be a good way of making sense out of the objects you want to place.


Other key things are that everything really should be in focus unless you have something like a vase of flowers that creates interest in a corner. If using an eye phone you can ensure that you have the correct angle by matching the white cross that will turn into one yellow cross when the surface is parallel to the phone. And one last image with a hand in. This turns the image from a thing into a moment. Pure magic!


I enjoyed reading this article because it highlights an important part of material processing. Quality rock sorters services in Reno-Tahoe can help improve workflow efficiency while reducing unnecessary waste. The content is informative, well-structured, and useful for anyone involved in construction, excavation, or aggregate-related projects throughout the region.
Great insights for frequent travelers. Reliable Airport Drop-Off Services in San Diego can help eliminate common transportation concerns while improving the overall airport travel experience.
One important aspect of APC success is the ability to reflect on professional experience and present it clearly. Project management provides a useful framework for organising this experience. This is why apc project management remains relevant in training discussions. The College of Contract Management occasionally appears in conversations about professional learning pathways. Reflection improves competency demonstration. Learning strengthens communication skills.
Professional development remains important in construction leadership roles. Understanding the diploma certificate helps highlight recognised industry benchmarks. The college of contract management offers guidance designed for professional review success.